

PlayableAPIでLive2D 3.0をアニメーションさせる

こんなきり!👿
カバー株式会社CTO室、エンジニアのKです。
昨年、ホロライブの新しいバージョンのLive2Dモデルとして、「Live2D 3.0」をリリースいたしました。最近も続々とお披露目の配信が行われているので、もうご覧になった方もいらっしゃるかと思います。
Live2D 3.0には様々な新機能がありますが、今回はアニメーションの実装にフォーカスして説明していきます。
Cubism SDK(Live2D)のアニメーション機能
前回の記事でお伝えした通り、ホロライブアプリはUnityというゲームエンジンで開発されています。
Live2Dは株式会社 Live2Dで開発されているシステムです。Live2DのモデルをUnityで動かすには、同社が開発している「Cubism SDK for Unity」を使用します。
Cubism SDKにはLive2Dモデルを動かすための機能が一通り揃っています。Live2Dモデルをアニメーションさせる機能も備わっており、Cubism EditorというLive2Dをモデリングするためのツールで予めアニメーションを作成すると、そのアニメーションをUnityで再生することができます。
Live2DのアニメーションはUnity標準のアニメーション機能で扱うことができます。
Animator Controller
Unity標準のアニメーション機能としてよく使われるのが、「Animator Controller」です。
Animator Controllerでは、ノードをつないでアニメーションを再生する順番や状態の遷移を設定することができます。以下のような画面でノードの接続と状態遷移の条件を設定することができます。
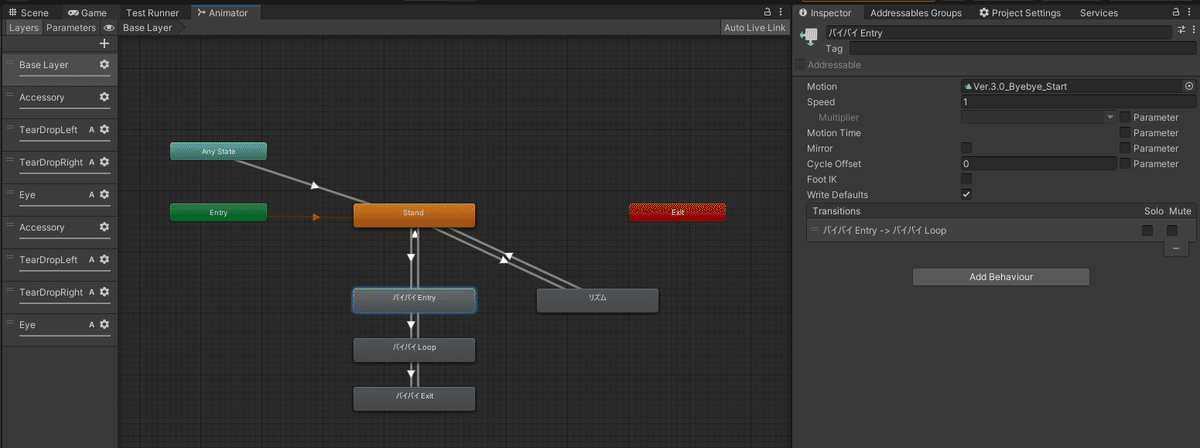
編集画面の四角形がノードです。ノードの間に引かれた矢印がアニメーションの状態遷移を表しています。これらのノードや矢印を操作することで、アニメーションの再生順や再生条件を設定できます。
ホロライブアプリでも、当初はAnimator ControllerでLive2Dモデルのアニメーション動作を実現していました。
しかし、アニメーションの数が増えてくるにつれて、Animator Controllerで管理するのが大変になってきました。各モデルに対してそれぞれAnimator Controllerの操作を行わなければならず、手間がかかっていました。また、Unityの編集画面でパラメータを操作するので、遷移条件の設定ミスなどに気づきにくいようになってしまっていました。
手動で設定する手間を減らすために、Animator Controllerを事前に自動生成するプログラムを作ったこともありました。しかし、Live2Dモデルをビルドする前にAnimatorControllerを自動生成するという手間は残り、運用の負担は完全には減らせませんでした(Animator Controllerはアプリの実行中に生成することができないので、事前に作っておく必要があります)。また、自動生成するためのプログラムが非常に複雑なものになり、開発しにくいものになってしまいました。
Playable APIによる実装へ
そこで、上記の課題を解決するために「Playable API」というUnityの機能を活用することにしました。
Playable APIはAnimator Controllerとは別のアニメーションシステムです。Animator Controllerとは異なる方法でアニメーションの管理を行うシステムで、アニメーションだけでなく音声やプログラムから渡されたデータなど、複数のソースを組み合わせて再生することができます。また、Animator Controllerのようにノードで状態遷移を組み立てるのではなく、プログラムでグラフ構造を構築してアニメーションを再生する仕組みになっています
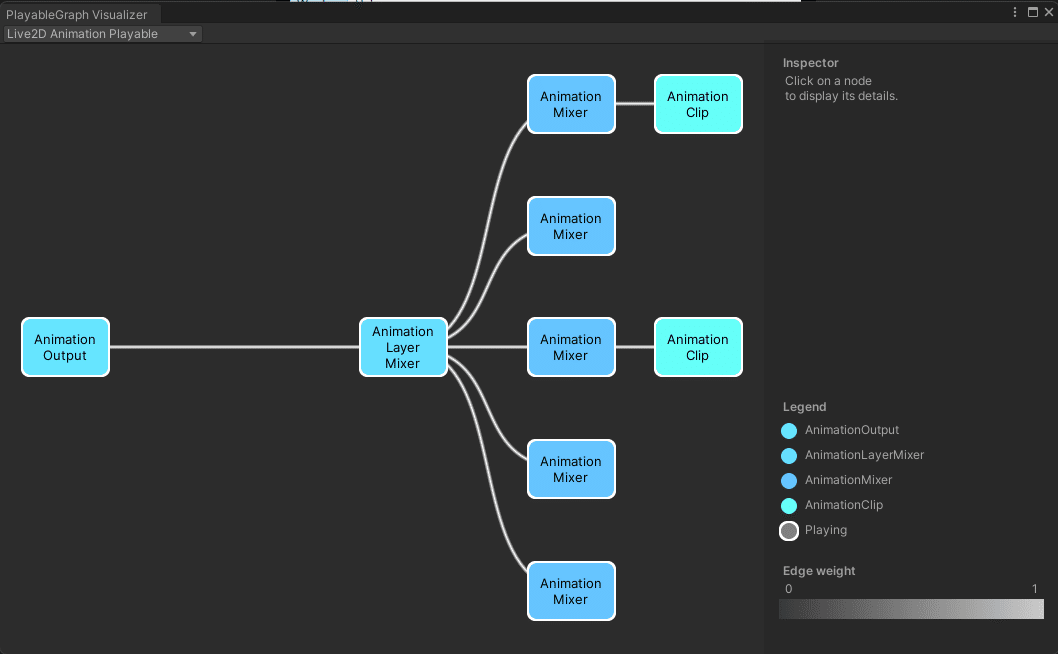
Live2D 3.0には様々なアニメーションがあります。手を振る、キーボードを光らせる、涙が落ちるなどのアニメーションがあり、それらを同時に再生できる必要があります。同時に再生するには、アニメーションごとにレイヤーを分けて再生します。上記のグラフに「Animation Layer Mixer」がありますが、これに繋がっている複数の「Animation Mixer」がそれぞれのレイヤーです。レイヤーごとに別々のAnimation Clipを再生しており、それらをAnimationLayerMixerで合成して出力します。
実際に作成したプログラムがこちらです↓
public class MotionLayer
{
        public AnimationMixerPlayable PlayableOutput { get; private set; }
        private PlayableGraph _playableGraph;
        private int _layerIndex;
        private float _layerWeight;

        private bool _cancellationRequested = false;
        private bool _forceExitRequested = false;

        private bool _speedChanged = false;
        private float _speed = 1;

        public MotionLayer(PlayableGraph playableGraph, int layerIndex, float layerWeight = 1.0f)
        {
            _playableGraph = playableGraph;
            _layerIndex = layerIndex;
            layerWeight = layerWeight;
            PlayableOutput = AnimationMixerPlayable.Create(playableGraph, 1);
        }

        public void Reset()
        {
            _cancellationRequested = false;
            _forceExitRequested = false;
        }

        public IEnumerator PlaySequentially(AnimationClip enter, AnimationClip loop, AnimationClip close)
        {
            if (enter != null)
            {
                var play = PlayAnimation(enter, waitUntilCancel: loop == null);
                yield return play;
                if(_forceExitRequested) yield break;
            }

            if (loop != null)
            {
                var play = PlayAnimation(loop, isLoop: true);
                yield return play;
                if(_forceExitRequested) yield break;
            }

            if (close != null)
            {
                var play = PlayAnimation(close);
                yield return play;
            }
        }

        public IEnumerator PlayAnimation(AnimationClip clip, bool isLoop = false, bool waitUntilCancel = false)
        {
            var clipLength = clip.length;

            var clipPlayable = AnimationClipPlayable.Create(_playableGraph, clip);
            clipPlayable.SetDuration(isLoop ? double.MaxValue : clipLength * _speed - 0.00001f);
            //↑再生時間をクリップの長さピッタリにすると最後のフレームの表示がおかしくなるので少し引く
            clipPlayable.SetSpeed(_speed);
            var endTime = Time.time + clipLength * _speed;

            PlayableOutput.DisconnectInput(0);
            PlayableOutput.ConnectInput(0, clipPlayable, 0);
            PlayableOutput.SetInputWeight(0, 1.0f);

            var lastTime = Time.time;
            do
            {
                yield return null;
                if (_forceExitRequested) yield break;
                if (_speedChanged)
                {
                    _speedChanged = false;
                    clipPlayable.SetSpeed(_speed);
                    endTime = lastTime + clipLength * _speed;
                }

                if (_speed < 0.0001f)
                {
                    lastTime = Time.time;
                    endTime = Time.time + 0.0001f;
                    continue;
                }

                while (isLoop && !_cancellationRequested && endTime <= Time.time)
                {
                    lastTime = endTime;
                    endTime += clipLength * _speed;
                }
            } while (Time.time < endTime);

            if (waitUntilCancel)
            {
                while (!_cancellationRequested) yield return null;
            }

            PlayableOutput.DisconnectInput(0);
        }

        public void ForceExit(AnimationClip clip)
        {
            var clipPlayable = AnimationClipPlayable.Create(_playableGraph, clip);
            clipPlayable.SetDuration(double.MaxValue);
            PlayableOutput.DisconnectInput(0);
            PlayableOutput.ConnectInput(0, clipPlayable, 0);
            PlayableOutput.SetInputWeight(0, 1.0f);

            _forceExitRequested = true;
        }

        public void Cancel()
        {
            _cancellationRequested = true;
        }

        public void SetSpeed(float speed)
        {
            _speed = speed;
            _speedChanged = true;
        }
}
以下、各部分について解説していきます。
Live2D 3.0で動かしたいアニメーションクリップは、「開始」→「ループ」→「終了」の3つのフェーズに分けられます。アニメーションクリップをそれぞれのフェイズごとに分けて作成し、それらを順番に再生する必要があります。例えば、バイバイ(手を振る)アニメーションだと、「手を上げる」→「手を振る(ループ)」→「手を降ろす」という3つに分けます。「開始」、「ループ」、「終了」
は常に全て使用するわけではなく、どれかのフェイズが存在しないパターンもあります。
今回の実装では、この3つのフェーズを一連のアニメーションのシークエンスと考え、各レイヤーごとにシークエンスを管理するクラスを作りました。このクラスの名前は「MotionLayer」としました。身体のアニメーション、涙のアニメーション、アクセサリのアニメーションなど、それぞれにMotionLayerが存在しており、独立してアニメーションを再生させます。
3つのアニメーションクリップを順に再生している部分がこちらです。
 public IEnumerator PlaySequentially(AnimationClip enter, AnimationClip loop, AnimationClip close)
{
  if (enter != null)
  {
      var play = PlayAnimation(enter, waitUntilCancel: loop == null);
        yield return play;
        if(_forceExitRequested) yield break;
  }

    if (loop != null)
    {
    var play = PlayAnimation(loop, isLoop: true);
    yield return play;
    if(_forceExitRequested) yield break;
  }

    if (close != null)
  {
      var play = PlayAnimation(close);
      yield return play;
    }
}
PlayableAPIでは、IPlayableのインターフェースを実装したクラスをつなぐことでグラフ構造を作ります。グラフ構造というと難しく聞こえるかもしれませんが、やっていることとしてはノードのインプットとアウトプットをつないでいるだけです。
以下の箇所でPlayableの接続を行っています。
public MotionLayer(PlayableGraph playableGraph, int layerIndex, float layerWeight = 1.0f)
{
  _playableGraph = playableGraph;
    _layerIndex = layerIndex;
    layerWeight = layerWeight;
    PlayableOutput = AnimationMixerPlayable.Create(playableGraph, 1); //playableGraphに新しいOutputを作成
}
public IEnumerator PlayAnimation(AnimationClip clip, bool isLoop = false, bool waitUntilCancel = false)
{
  var clipLength = clip.length;

  var clipPlayable = AnimationClipPlayable.Create(_playableGraph, clip);
  clipPlayable.SetDuration(isLoop ? double.MaxValue : clipLength * _speed - 0.00001f);
    //↑再生時間をクリップの長さピッタリにすると最後のフレームの表示がおかしくなるので少し引く
   clipPlayable.SetSpeed(_speed);
   var endTime = Time.time + clipLength * _speed;

    PlayableOutput.DisconnectInput(0);
   PlayableOutput.ConnectInput(0, clipPlayable, 0); //AnimationClipのノードを接続
    PlayableOutput.SetInputWeight(0, 1.0f);

     //後略...
}
また、特定のアニメーションで再生速度を変更したいという要件があったため、SetSpeedから再生速度を変更できるようにしています。
public void SetSpeed(float speed)
{
  _speed = speed;
   _speedChanged = true;
}
このMotionLayerをAnimationLayerMixerPlayableに接続すると、グラフが完成してアニメーションが動作するようになります。以下がMotionLayerの利用側でグラフを接続するプログラムです。
private int _layerCount = 5;

private PlayableGraph _playableGraph;
private AnimationPlayableOutput _playableOutput;
private AnimationLayerMixerPlayable _layerMixer;
private MotionLayer[] _motionLayers;

void Awake()
{
  _playableGraph = PlayableGraph.Create("Live2D Animation Playable");
   _playableOutput =
      AnimationPlayableOutput.Create(_playableGraph, "Animator Output", GetComponent<Animator>());
    _playableOutput.SetWeight(1);

  _layerMixer = AnimationLayerMixerPlayable.Create(_playableGraph, _layerCount);

    _motionLayers = new MotionLayer[_layerCount];
    for (int i = 0; i < _motionLayers.Length; i++)
    {
      _motionLayers[i] = new MotionLayer(_playableGraph, i);
      _layerMixer.ConnectInput(i, _motionLayers[i].PlayableOutput, 0);
      _layerMixer.SetInputWeight(i, 1);
    }

    _playableOutput.SetSourcePlayable(_layerMixer);
}
以上のようなプログラムでPlayableGraphを構築すると、アニメーションが再生できるようになります。

実装した結果
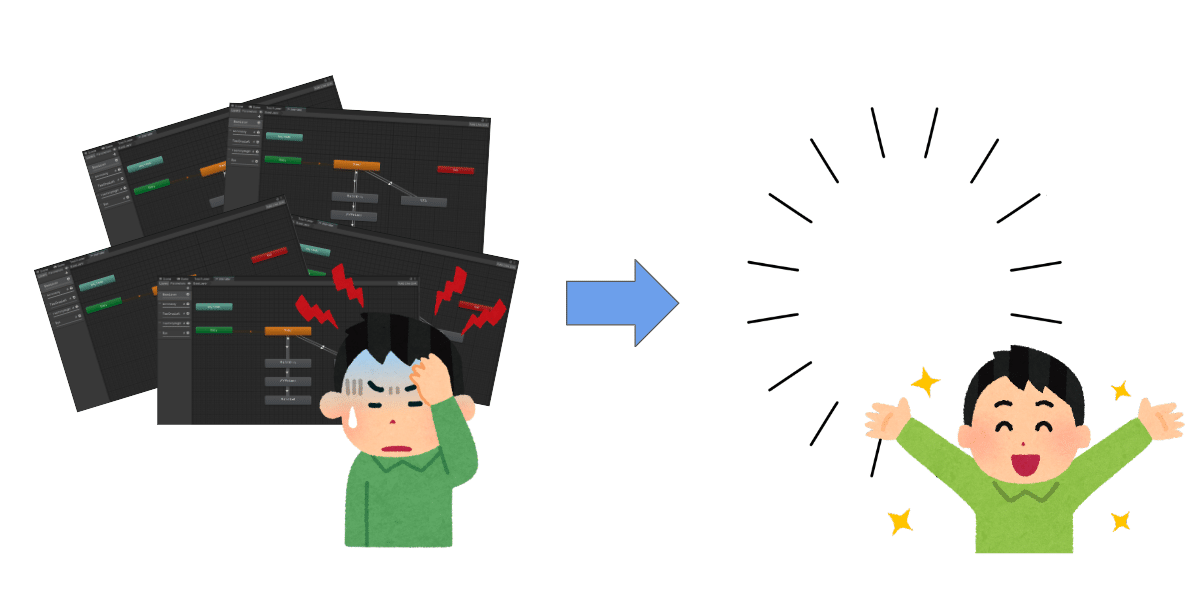
Playable APIでアニメーションの再生機構を作り直した結果、モデルの設定作業が非常に楽になりました。以前はAnimator Controllerの設定を行う必要があったのが、Animation Clipをインスペクタにアタッチするだけでアニメーションの設定が完了するようになりました。
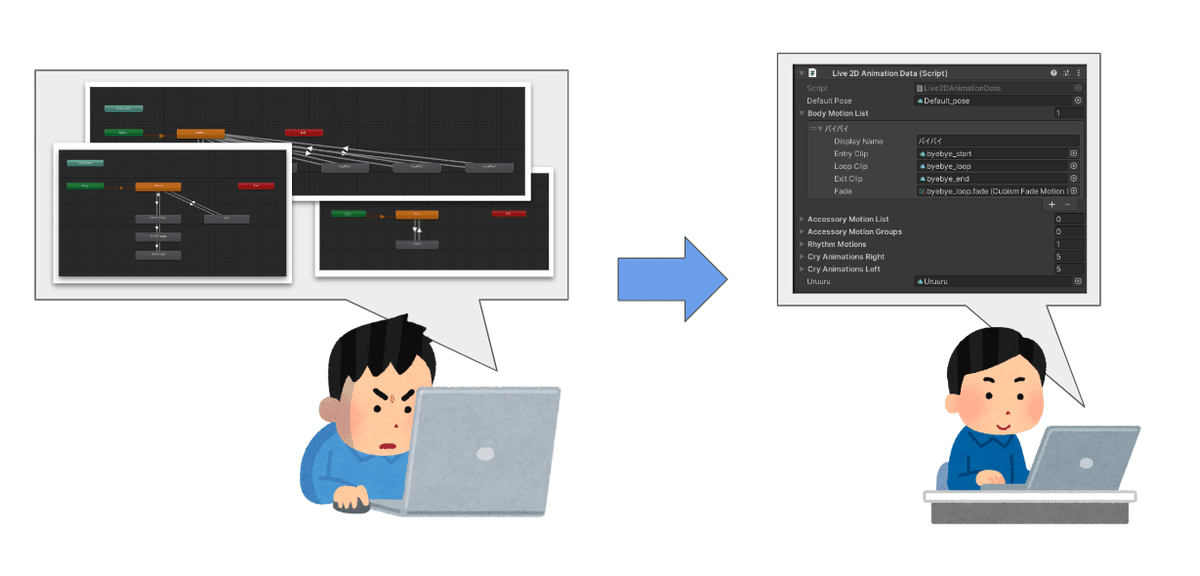
また、アニメーションを再生するための中間ファイルとして存在していたAnimator Controllerが必要なくなり、管理の手間や操作ミスによるバグも無くすことが出来ました。
まとめ
今回は、Live2D 3.0のアニメーションシステムの一部を紹介しました。Playable APIはAnimator Controllerに比べてまだネットの情報が少ないため、これから実装される方の参考になれば幸いです。
今年の半ばから始めたCOVER Techブログも、この記事ではや6本目です。皆さん今年もありがとうございました。
ちなみに、この12月はQiitaのアドベントカレンダーにも弊社から記事を出しております。もしよければご覧ください。
来年からもカバーの技術発信をさらに強化していきたい所存です。弊社とホロライブプロダクションをこれからもよろしくお願いします。
それでは、良いお年を!